
How To Make Homemade Yogurt (Step By Step)
Homemade yogurt is not as daunting a task as you may think. All you need is good quality milk, a starter (such as a few teaspoons of store bought yogurt), a pot, and a little resting time. The recipe I have developed is quite versatile - to lighten it up you can use low fat milk (my personal favorite is 2 percent) instead of whole milk. As you decrease the fat content of the milk, the yogurt will turn out thinner (with skim milk producing the thinnest consistency). However, to counteract the thinning of the yogurt, you can add dry milk powder to the milk as it is heating (up to ½ cup). Homogenized milk will produce a yogurt that is smooth throughout, while non-homogenized milk will produce a yogurt that has a layer of cream on top.
If you would like to make a Greek style yogurt - line a colander with cheesecloth, place over a bowl, and pour finished yogurt into the colander. Place in the refrigerator for 2 to 6 hours to drain, or until desired thickness is obtained. If the yogurt becomes too thick, add a small amount of the whey back into the yogurt. Fun fact - don’t throw away the whey - it can be used in smoothies, soups, or as a marinade for lamb or chicken!
In this recipe, I suggest using a few spoonfuls of your favorite store bought yogurt as a starter. The good news is that once you have made your homemade yogurt you can reserve some of it to use as a starter in your next batch. However, over time the probiotic strains in the homemade yogurt will weaken - so you cannot repeat this process indefinitely. Alternatively, you can purchase yogurt starter cultures or probiotic capsules to use as the starter. Simply read the product’s instructions to utilize the correct amount for this recipe. I frequently use dried yogurt cultures in my homemade yogurt and consistently get excellent results.
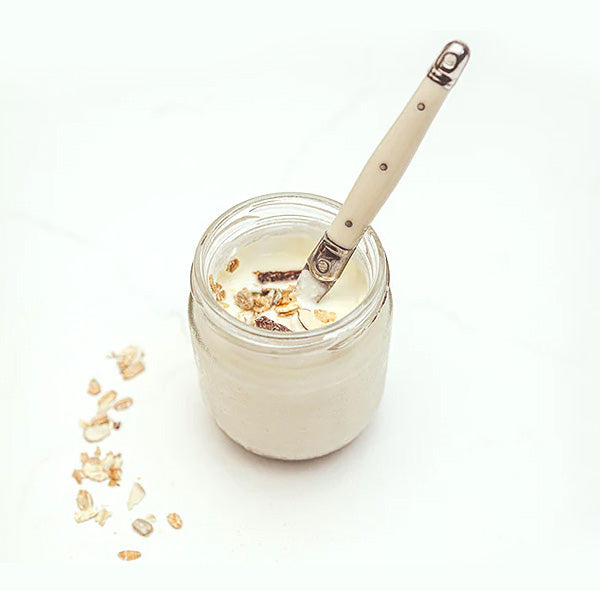
You can eliminate the pot and purchase an electronic yogurt maker. This tool works extremely well and the “heating” times can easily be adjusted to accommodate the type of milk you utilize. However, I developed this recipe so that homemade yogurt can be created with simple tools already available in your kitchen. Yogurt isn’t just for breakfast! (Although I regularly enjoy it with some homemade granola and seasonal fruit). I regularly incorporate it into my baked goods. The creaminess of the yogurt assists in keeping baked goods moist. In addition, the tanginess of the yogurt imparts a unique, “old-fashioned” flavor. Finally, the natural acidity of the yogurt helps to activate baking soda - which results in baked goods that are light and fluffy. It is a great, healthy substitute in recipes that call for sour cream, mayonnaise, or creme fraiche.
When developing the Cranberry Ginger Tea Bread recipe, I incorporated yogurt into the batter to counteract and lighten the ground oatmeal base, create a moist batter, and provide tangy undertones. I believe this one ingredient accomplishes all of these goals, and the bonus is I made the yogurt in my own kitchen! Invest in some high quality milk, pull out a pot, and create your very own unique yogurt. It will not disappoint!
If you would like to make a Greek style yogurt - line a colander with cheesecloth, place over a bowl, and pour finished yogurt into the colander. Place in the refrigerator for 2 to 6 hours to drain, or until desired thickness is obtained. If the yogurt becomes too thick, add a small amount of the whey back into the yogurt. Fun fact - don’t throw away the whey - it can be used in smoothies, soups, or as a marinade for lamb or chicken!
In this recipe, I suggest using a few spoonfuls of your favorite store bought yogurt as a starter. The good news is that once you have made your homemade yogurt you can reserve some of it to use as a starter in your next batch. However, over time the probiotic strains in the homemade yogurt will weaken - so you cannot repeat this process indefinitely. Alternatively, you can purchase yogurt starter cultures or probiotic capsules to use as the starter. Simply read the product’s instructions to utilize the correct amount for this recipe. I frequently use dried yogurt cultures in my homemade yogurt and consistently get excellent results.
You can eliminate the pot and purchase an electronic yogurt maker. This tool works extremely well and the “heating” times can easily be adjusted to accommodate the type of milk you utilize. However, I developed this recipe so that homemade yogurt can be created with simple tools already available in your kitchen. Yogurt isn’t just for breakfast! (Although I regularly enjoy it with some homemade granola and seasonal fruit). I regularly incorporate it into my baked goods. The creaminess of the yogurt assists in keeping baked goods moist. In addition, the tanginess of the yogurt imparts a unique, “old-fashioned” flavor. Finally, the natural acidity of the yogurt helps to activate baking soda - which results in baked goods that are light and fluffy. It is a great, healthy substitute in recipes that call for sour cream, mayonnaise, or creme fraiche.
When developing the Cranberry Ginger Tea Bread recipe, I incorporated yogurt into the batter to counteract and lighten the ground oatmeal base, create a moist batter, and provide tangy undertones. I believe this one ingredient accomplishes all of these goals, and the bonus is I made the yogurt in my own kitchen! Invest in some high quality milk, pull out a pot, and create your very own unique yogurt. It will not disappoint!
Servings: 7 cups (1 3/4 quarts)
Ingredients:
- 2 quarts whole milk (ideally organic)
- 1/4 cup heavy cream (ideally organic)
- 3 - 4 tbsps plain whole milk yogurt with live and active cultures
Instructions:
- Add milk and heavy cream to a pot and bring to a simmer, but not a boil. (Bubbles should form around the edges of the pan.) To prevent scorching, stir occasionally while the milk is heating. Use a kitchen thermometer to confirm the milk is between 180F and 200F before proceeding to the next step.
- Remove the pot from the heat and allow the temperature of the milk to reduce to between 110F and 120F.
- Transfer half a cup of the warm milk to a small bowl and whisk in the yogurt until smooth. Stir yogurt mixture into the pot of remaining warm milk.
- Cover the pot with a lid and wrap with a tea towel to keep warm. Place the pot in the oven with the light turned on. (This will assist in extending the length of time the pot will remain warm).
- Let yogurt sit for 6 to 12 hours until it is thick and tangy. The longer it sits the more thick the consistency and the more tangy the flavor.
- Transfer the pot to the refrigerator and allow to chill for at least 4 hours. The yogurt will continue to thicken as it chills.
- Enjoy!

Paula
Crumble Crate is the culmination of years of experimenting with cooking and baking in my home kitchen. Since I was a small child, I found a simple pleasure in creating fresh delicious treats and sharing them with my family and friends. As life became more complicated, the basic task of baking in my kitchen became an even more critical and comforting sanctuary.I want to share this joy of baking with you so that you too can experience the bliss you feel when you create and share fresh baked goodies with your loved ones. My goal is for us to explore baking together and take the stress out of the process so that you can decompress and learn to find refuge in your kitchen. I can’t wait to begin this baking journey with each of you!