

How to Temper Chocolate Like a Pro: Techniques, Tools & Tips for Success
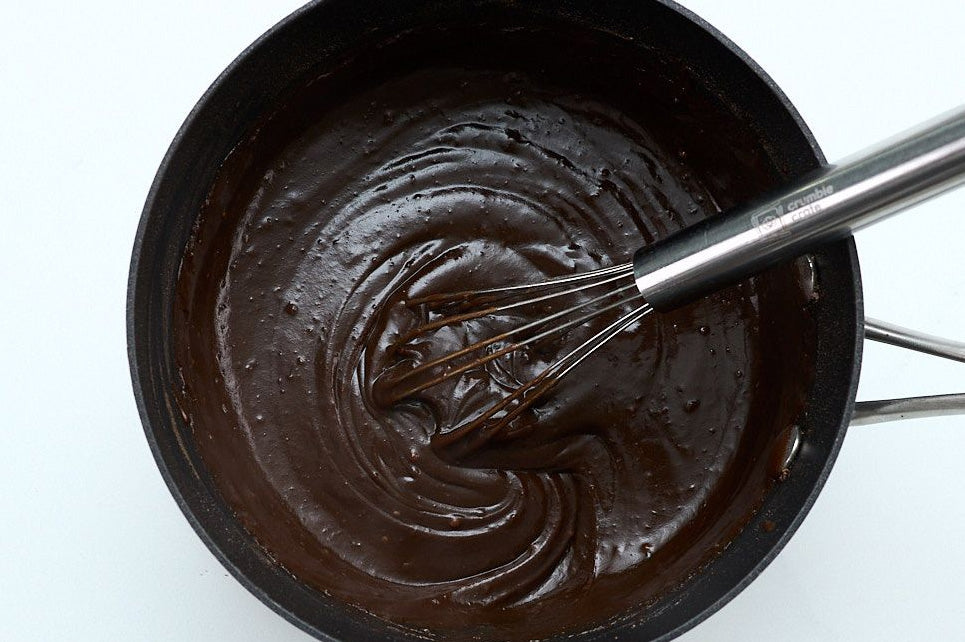
The first time I tried to temper chocolate, I ruined an entire bag of good dark chocolate because I let it hit 95°F before I even started cooling it down — it set up dull and streaky, and a thin gray film formed on top within an hour. That's chocolate bloom, and it's the single most common thing that goes wrong for home bakers. The good news is that once you understand why it happens, tempering stops being intimidating. It's a process, not a trick, and it's very learnable with a thermometer and a little patience.
Tempering chocolate is the process of heating and cooling chocolate in a controlled way so its cocoa butter forms stable crystals. Done right, it gives you that glossy shine, a clean snap when you break it, and chocolate that holds its shape at room temperature instead of melting on your fingers. If you're dipping strawberries, making bark, or filling molded chocolates, tempering matters. If you're folding chocolate into brownie batter or melting it for ganache, you can skip this entire process.
BEFORE YOU SCROLL
Here's $5 toward your first bake
Join Pastry Perks free and follow us on Instagram. That's 100 perks — a $5 reward, more than 10% off any baking kit. No purchase, no catch.
Join Pastry Perks — freeTakes about a minute. New members start with 50 bonus perks.
Understanding the Science of Tempering
Chocolate is made up of cocoa solids, cocoa butter, sugar, and (in milk and white chocolate) milk solids. Cocoa butter is the part that matters for tempering — it's a fat that can crystallize into six different forms, and only one of them, Form V, gives you that smooth, glossy, snappy result.
When you melt chocolate completely, you destroy all of its existing crystal structure. Tempering rebuilds it on purpose: melt fully, cool down to encourage Form V crystals to form, then warm slightly to a working temperature that's still in temper but fluid enough to use. Skip the cooling step and your chocolate sets into a mix of unstable crystal forms — that's what causes bloom, softness, and a dull finish.
The Seed Method (Most Reliable for Home Bakers)
The seed method is the easiest way to temper chocolate at home, and it's the one I use for almost everything — bark, dipped fruit, bonbon shells. It works by adding already-tempered chocolate (the "seed") into melted chocolate, which introduces stable Form V crystals and pulls the temperature down at the same time.
- Melt the chocolate. Chop finely and melt about two-thirds in a double boiler, stirring often, until it reaches 115–120°F for dark, or 110–115°F for milk/white.
- Add the seed chocolate. Remove from heat and stir in the remaining third, finely chopped, a little at a time.
- Cool to the tempering range. Keep stirring until it drops to 82–84°F for dark, or 80–82°F for milk/white.
- Bring it back to working temperature. Gently rewarm over the double boiler, just a degree or two. Don't exceed your original melting temperature.
How to test if it worked: Dip a clean knife tip into the chocolate and set it on the counter for 3–5 minutes. Glossy and snaps clean? You're in temper. Soft, streaky, or dull? Keep seeding, or start over.
Quick reminder: following us on Instagram banks you 100 Pastry Perks — $5 toward a kit. Grab yours here.
How to Temper Chocolate on a Marble Slab
Tabling on marble is the traditional method most professional chocolatiers use. Marble stays cool and pulls heat out of melted chocolate quickly and evenly — something a regular countertop can't do as well. Melt fully, pour two-thirds onto the slab, work it with a spatula until it thickens slightly, check the temperature, then recombine with the reserved warm third and stir to a consistent working temperature.
This method gives excellent results but takes practice and counter space, so it's better suited to larger batches. Lay parchment down first — tempered chocolate drips peel off parchment far more easily than they scrape off a counter.
How to Temper Chocolate Without a Thermometer
The Lip Test: Dab melted chocolate just below your bottom lip. Tempered, working-temperature chocolate should feel just barely cool — not warm, not cold.
The Spoon Test: Dip a clean spoon into the chocolate and rest it on parchment for 3–5 minutes. Glossy and snaps clean means it's tempered.
The Seed-and-Watch Method: Melt until just barely too hot to comfortably hold your hand against the bowl, then stir in unmelted chopped chocolate gradually until it passes the spoon test.
None of these methods are quite as consistent as a inexpensive digital thermometer, so if you plan to temper chocolate more than once or twice, it's worth the small investment.
How to Temper White Chocolate at Home
White chocolate has no cocoa solids at all — just cocoa butter, sugar, and milk solids — which makes it more delicate to temper. It scorches and seizes more easily, so the process rewards a gentler hand: melt gently to 110–115°F, seed with the reserved third, cool to 80–82°F, then rewarm slightly. Check the temperature often; white chocolate's working window is narrower than dark's.
How to Temper Chocolate in the Microwave
The microwave method is the one I recommend most often to beginners — forgiving, no special equipment, works for dark, milk, and white alike. Chop finely, microwave at 50% power in 15–20 second bursts, stirring between each, and stop at about 75% melted. Keep stirring off the heat until smooth and in range — the unmelted pieces seed the batch, same principle as the seed method above.
Chocolate Types and Their Tempering Temperatures
| Chocolate Type | Melt To | Cool To (Temper) |
|---|---|---|
| Dark Chocolate | 115–120°F | 82–84°F |
| Milk Chocolate | 110–115°F | 80–82°F |
| White Chocolate | 110–115°F | 80–82°F |
Milk and white temper a little lower than dark — their milk solids and added fats make the crystal structure more heat-sensitive.
What Chocolate to Use
Use real couverture or baking chocolate with a high cocoa butter content — check the label for "cocoa butter," not just "vegetable fat" or "palm oil." Compound chocolate will never temper properly, because it doesn't contain the cocoa butter crystals the whole process depends on. Skip chocolate chips too — most contain stabilizers that interfere with a clean, even temper. I learned that one the hard way.
Essential Tools and Equipment
- Digital thermometer — non-negotiable for reliable results. Don't have one yet? Ours is $11.99, has a 7-inch probe built for exactly this, and counts toward your Pastry Perks too.
- Double boiler — a heatproof bowl set over (not touching) simmering water works fine if you don't own a dedicated set.
- Silicone spatula — for stirring without scratching your bowl.
- Marble or granite slab (optional) — only needed for the marble slab method.
- Parchment paper — for clean release and easy cleanup.
- Heatproof bowls — stainless steel is the better choice; glass retains heat longer and can slow your cooling step.
Pro Tips for Success
- Use real chocolate. Compound chocolate and chips won't temper.
- Start small. A 12–16 oz batch is plenty while you're learning.
- Be patient with the cooling step. Most failed attempts come from rushing this part — 10–15 minutes of steady stirring is normal.
- Keep everything bone dry. A single drop of water will cause chocolate to seize.
- If it seizes, don't panic. Stir in warm cream or neutral oil to smooth it into a drizzling sauce — it won't be tempered anymore, but it won't go to waste.
Troubleshooting
| Problem | Likely Cause | Fix |
|---|---|---|
| White or gray streaks (bloom) | Wasn't fully tempered, or stored too warm | Remelt and re-temper from scratch |
| Too thick to work with | Cooled too far below working range | Gently rewarm a degree at a time |
| Streaky, uneven finish | Temperature swung too high or low | Retest with your thermometer more often |
| Seized into a grainy clump | Water got into the bowl | Can't be re-tempered — stir in warm cream to repurpose as sauce |
What You Can Make With Tempered Chocolate
Once you've got the technique down, tempered chocolate opens up a lot of possibilities:
- Hand-rolled truffles
- Chocolate bark with nuts and dried fruit
- Dipped strawberries, cookies, and pretzels
- Molded chocolate shapes and decorations
- Glossy shells for filled bonbons
If you want to put your new skill to work right away, our Salted Caramel Turtle Brownies kit walks you through a real dip-and-set application — pre-portioned chocolate, no guessing on quantities, a good way to practice without committing to a full bag of couverture on your first try. Prefer to browse everything first? Here's the full collection.
Frequently Asked Questions
Do I need a marble slab to temper chocolate?
No. The seed method or the microwave method both work well on a normal kitchen counter with nothing more than a bowl and a spatula.
Can you temper chocolate without a thermometer?
Yes, using the lip test or spoon test above, though results are less consistent. If you plan to temper regularly, an inexpensive digital thermometer makes the whole process noticeably easier.
Can you temper chocolate chips?
Not reliably. Most contain stabilizers that prevent a clean, stable crystal structure. Use couverture or a baking bar with cocoa butter listed as a primary ingredient instead.
How long does tempered chocolate last?
Stored in a cool, dry, dark place — not the refrigerator — it will keep its snap and shine for several weeks to a few months. Refrigeration introduces condensation, which causes bloom.
Why did my chocolate seize?
Almost always water. Even a small splash from steam or a damp spatula can cause melted chocolate to clump into a thick, grainy paste. It can't be re-melted smooth, though you can rescue it as a sauce with warm cream.
Do I need to temper chocolate for baking?
No. Tempering only matters when chocolate needs to set up firm, glossy, and stable at room temperature on its own — dipping, molding, bark, and bonbon shells. Melting into a batter, ganache, or sauce skips tempering entirely.
Tempering chocolate is genuinely one of those kitchen skills where the first attempt is the hardest and every attempt after that gets noticeably easier. Once you've felt what properly tempered chocolate looks and behaves like, you'll recognize it instantly the next time.
PRACTICE MAKES PERFECT
Turn this know-how into $5 off
You came for a clean snap and a glossy finish — leave with a reward. Join Pastry Perks free and follow us on Instagram to earn 100 perks, good for $5 off any baking kit, including the Salted Caramel Turtle Brownies kit above. That's more than 10% off, just for following along.
Get my 100 perksJoin free, start with 50 bonus perks, and earn more every time you bake. 4.9/5 from 10,847 bakers.

Paula
Crumble Crate is the culmination of years of experimenting with cooking and baking in my home kitchen. Since I was a small child, I found a simple pleasure in creating fresh delicious treats and sharing them with my family and friends. As life became more complicated, the basic task of baking in my kitchen became an even more critical and comforting sanctuary.I want to share this joy of baking with you so that you too can experience the bliss you feel when you create and share fresh baked goodies with your loved ones. My goal is for us to explore baking together and take the stress out of the process so that you can decompress and learn to find refuge in your kitchen. I can’t wait to begin this baking journey with each of you!


