
Meringue Kisses
Whenever I am baking certain cakes, pastries or custards, the recipe will require egg yolks. Inevitably there will be leftover egg whites and the question becomes - what to make with them? I tend to want to get creative and think beyond the basic egg white omelet. A lemon meringue pie, tart, or cake are excellent choices, but you do have to use egg yolks to make the delicious lemon curd filling. This means that you are in an endless cycle of leftover egg yolks versus leftover egg whites - and eventually you need to pause the baking and enjoy the baked treats!
One of my favorite “egg white only” bakes are simple meringue kisses. These crispy, airy bites of sugar are easy to whip up and are actually quite versatile. There are a few keys to success in making meringues. For proper peaks, be sure to have your egg whites at room temperature and that no egg yolk (fat) remains in your egg whites. To be extra cautious that no fat is present, I wipe down my bowl with white vinegar prior to starting my meringues. Also, don’t be tempted to dump the sugar into the egg whites. Take your time to add the sugar in a slow stream so that it has an opportunity to properly incorporate into the egg whites. This prevents the egg whites from deflating and also removes any gritty texture from the meringues. Of course, don’t over beat the egg whites - you don’t want to go beyond stiff peaks! Finally, you know when your meringues are baked when they are dry on the outside and lift easily from the parchment paper. You want the meringues to be crispy and not sticky. Follow these tips and you will be creating airy pillows of sweetness that literally melt in your mouth.
I tend to make my meringues in the evening. To properly set the meringue, you should turn off the oven and let them cool completely with the oven door shut. This can take a few hours - which means I can turn off the oven and let them cool until morning. When I wake up, these little gems are ready (and I’m not beyond enjoying a few with my morning cup of coffee)!
I prefer using an open star pastry tip to make my meringues because I adore the shape and look. However, you can use a round pastry trip for a more smooth look and traditional “kiss” appearance. Simply vary the size of the pastry tip to vary the size of your meringue kisses. I used a very small open star pastry tip to create the mini meringue kisses that adorn the Mini Fruit Tarts with Vanilla Pastry Cream and the pastry tip from the Carrot Cake Roulade Baking Kit to create the larger meringues in the photo shown on the recipe blog. The size and shape really depends on your personal preference and ultimate use of the meringue kisses. Just keep in mind that you will need to adjust the cooking time, depending on the size of meringues you pipe! If you don’t feel like pulling out a piping bag and a pastry tip, simply use two spoons to drop dollops of the meringue directly on the parchment paper. The result is a bit more rustic and artistic - but equally appealing.
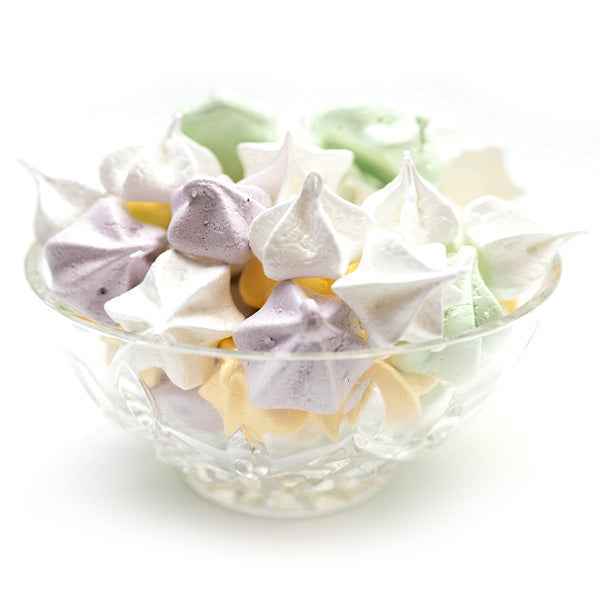
Prior to piping out your meringues - feel free to color the batter to suit your mood or occasion. For spring, I lean toward a variety of pastel colors. For the holiday season, I will add stripes of red to mimic candy canes. I do recommend using powdered food coloring because it will not affect the texture of your meringues. If you are trying to achieve an intense color with liquid food coloring, you may add too much and your meringues will not set properly or become sticky in texture.
If you would like to experiment with flavors, use a small amount of natural extracts. Vanilla, mint, orange, and lemon extracts (when used in moderation) add a lovely flavor profile to these sweet treats. You can also dip the bottom of the kisses in melted chocolate and then colorful sprinkles or finely chopped nuts for a beautiful presentation, plus added texture and flavor. The options for flavor, shape, and presentation are endless!
Meringues tend to absorb moisture. To avoid soggy meringues, store in an airtight container at room temperature for up to two weeks. An added bonus is that these sweet treats are gluten free - so don’t forget to share them with your gluten intolerant friends! Once you master making these little morsels of goodness you won’t be struggling to figure out what to create with your leftover egg whites again!
One of my favorite “egg white only” bakes are simple meringue kisses. These crispy, airy bites of sugar are easy to whip up and are actually quite versatile. There are a few keys to success in making meringues. For proper peaks, be sure to have your egg whites at room temperature and that no egg yolk (fat) remains in your egg whites. To be extra cautious that no fat is present, I wipe down my bowl with white vinegar prior to starting my meringues. Also, don’t be tempted to dump the sugar into the egg whites. Take your time to add the sugar in a slow stream so that it has an opportunity to properly incorporate into the egg whites. This prevents the egg whites from deflating and also removes any gritty texture from the meringues. Of course, don’t over beat the egg whites - you don’t want to go beyond stiff peaks! Finally, you know when your meringues are baked when they are dry on the outside and lift easily from the parchment paper. You want the meringues to be crispy and not sticky. Follow these tips and you will be creating airy pillows of sweetness that literally melt in your mouth.
I tend to make my meringues in the evening. To properly set the meringue, you should turn off the oven and let them cool completely with the oven door shut. This can take a few hours - which means I can turn off the oven and let them cool until morning. When I wake up, these little gems are ready (and I’m not beyond enjoying a few with my morning cup of coffee)!
I prefer using an open star pastry tip to make my meringues because I adore the shape and look. However, you can use a round pastry trip for a more smooth look and traditional “kiss” appearance. Simply vary the size of the pastry tip to vary the size of your meringue kisses. I used a very small open star pastry tip to create the mini meringue kisses that adorn the Mini Fruit Tarts with Vanilla Pastry Cream and the pastry tip from the Carrot Cake Roulade Baking Kit to create the larger meringues in the photo shown on the recipe blog. The size and shape really depends on your personal preference and ultimate use of the meringue kisses. Just keep in mind that you will need to adjust the cooking time, depending on the size of meringues you pipe! If you don’t feel like pulling out a piping bag and a pastry tip, simply use two spoons to drop dollops of the meringue directly on the parchment paper. The result is a bit more rustic and artistic - but equally appealing.
Prior to piping out your meringues - feel free to color the batter to suit your mood or occasion. For spring, I lean toward a variety of pastel colors. For the holiday season, I will add stripes of red to mimic candy canes. I do recommend using powdered food coloring because it will not affect the texture of your meringues. If you are trying to achieve an intense color with liquid food coloring, you may add too much and your meringues will not set properly or become sticky in texture.
If you would like to experiment with flavors, use a small amount of natural extracts. Vanilla, mint, orange, and lemon extracts (when used in moderation) add a lovely flavor profile to these sweet treats. You can also dip the bottom of the kisses in melted chocolate and then colorful sprinkles or finely chopped nuts for a beautiful presentation, plus added texture and flavor. The options for flavor, shape, and presentation are endless!
Meringues tend to absorb moisture. To avoid soggy meringues, store in an airtight container at room temperature for up to two weeks. An added bonus is that these sweet treats are gluten free - so don’t forget to share them with your gluten intolerant friends! Once you master making these little morsels of goodness you won’t be struggling to figure out what to create with your leftover egg whites again!
Servings: 3 dozen
Ingredients:
- 2 large egg whites, room temperature
- ¼ tsp cream of tartar
- Pinch of salt
- ½ cup plus 1 tbsp granulated sugar
Instructions:
- Preheat the oven to 200 F.
- Line two baking sheets with parchment paper. Set aside.
- Place egg whites, cream of tartar, and salt in a large bowl. Use a hand mixer (or stand mixer) to beat until soft peaks form.
- With your mixer on low, gradually add the sugar. Continue to beat until the egg whites are smooth, glossy, and stiff. Rub a small amount of the egg white mixture between your fingers to make sure that no grit from the sugar remains.
- Fit a pastry bag with a star tip. Pipe meringues onto the prepared baking sheets.
- Bake for 30 minutes. Turn off the oven. Leave the meringues in the oven with the door shut until they have cooled completely.
- Store meringues in an airtight container at room temperature.
- Enjoy!

Paula
Crumble Crate is the culmination of years of experimenting with cooking and baking in my home kitchen. Since I was a small child, I found a simple pleasure in creating fresh delicious treats and sharing them with my family and friends. As life became more complicated, the basic task of baking in my kitchen became an even more critical and comforting sanctuary.I want to share this joy of baking with you so that you too can experience the bliss you feel when you create and share fresh baked goodies with your loved ones. My goal is for us to explore baking together and take the stress out of the process so that you can decompress and learn to find refuge in your kitchen. I can’t wait to begin this baking journey with each of you!


